Adobe InDesign is the publishing industry’s standard for formatting books, but its versatility means the PDF export options can be intimidating if you’re new to print production. The good news is that you don’t need to know everything about InDesign’s export options to get an excellent, reader-ready result.
Know Your Printer’s Specifications
If this is your first time working with a print provider, whether it’s KDP, IngramSpark, or someone else, make sure you spend time learning their requirements. You can find KDP’s latest guidelines here and IngramSpark’s here. If you’re using another print provider, make sure to explore their website or get in touch with someone who can help you familiarize yourself with their requirements.
Fine-Tune the PDF Export Options
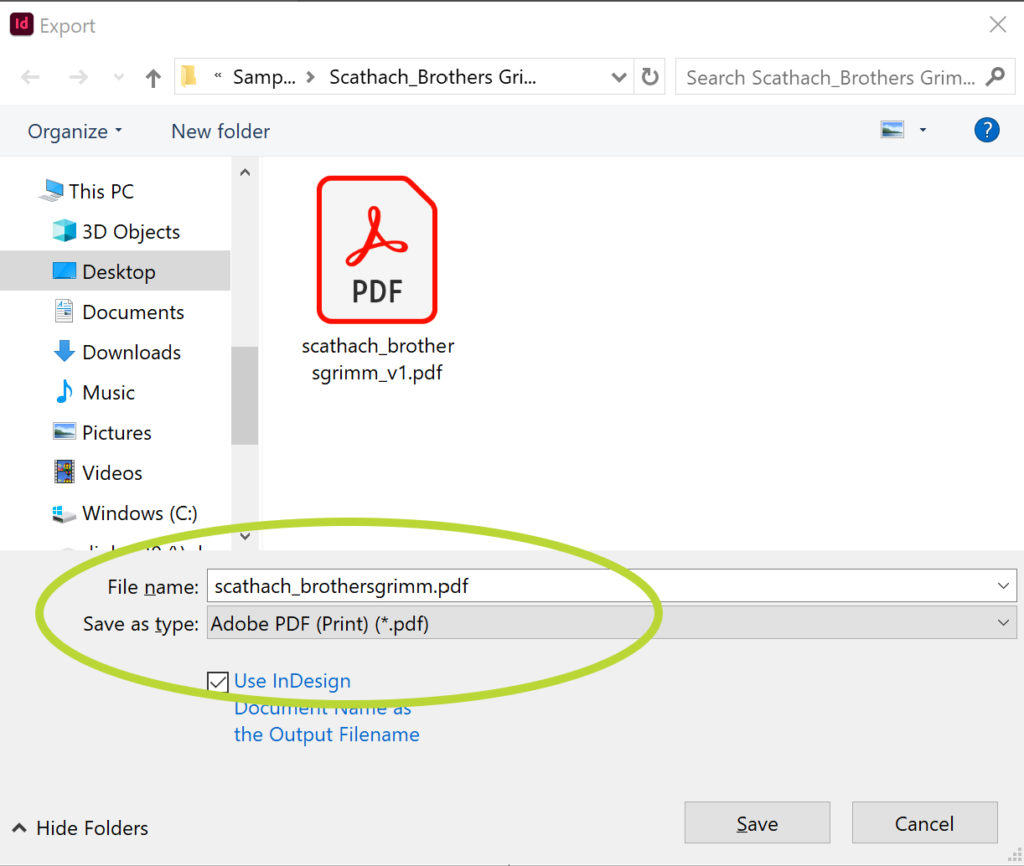
To get to the PDF Export Options panel, first hit Ctrl + E on a PC or Cmd + E on a Mac (or you can go to the top menu in InDesign and select File > Export). A save menu will pop up, and you can navigate to where you want your exported PDF to save to on your computer. You can also choose the file name, and below that bar is an option called “Save as type.” This “Save as type” menu has a number of options. The one you want right now is “Adobe PDF (Print).” Select this, verify your file name and location, and hit the Save button.
The next menu to pop up has “Export Adobe PDF” at the top. Most of the default settings for InDesign’s high quality print present are perfect for print on demand, but there are a few things you should verify are correct.
General Options
The first set of options you encounter are the General options for PDF exports. There are two main things to check here: that your entire book is included and you export the file as pages.
Export as the Full Book
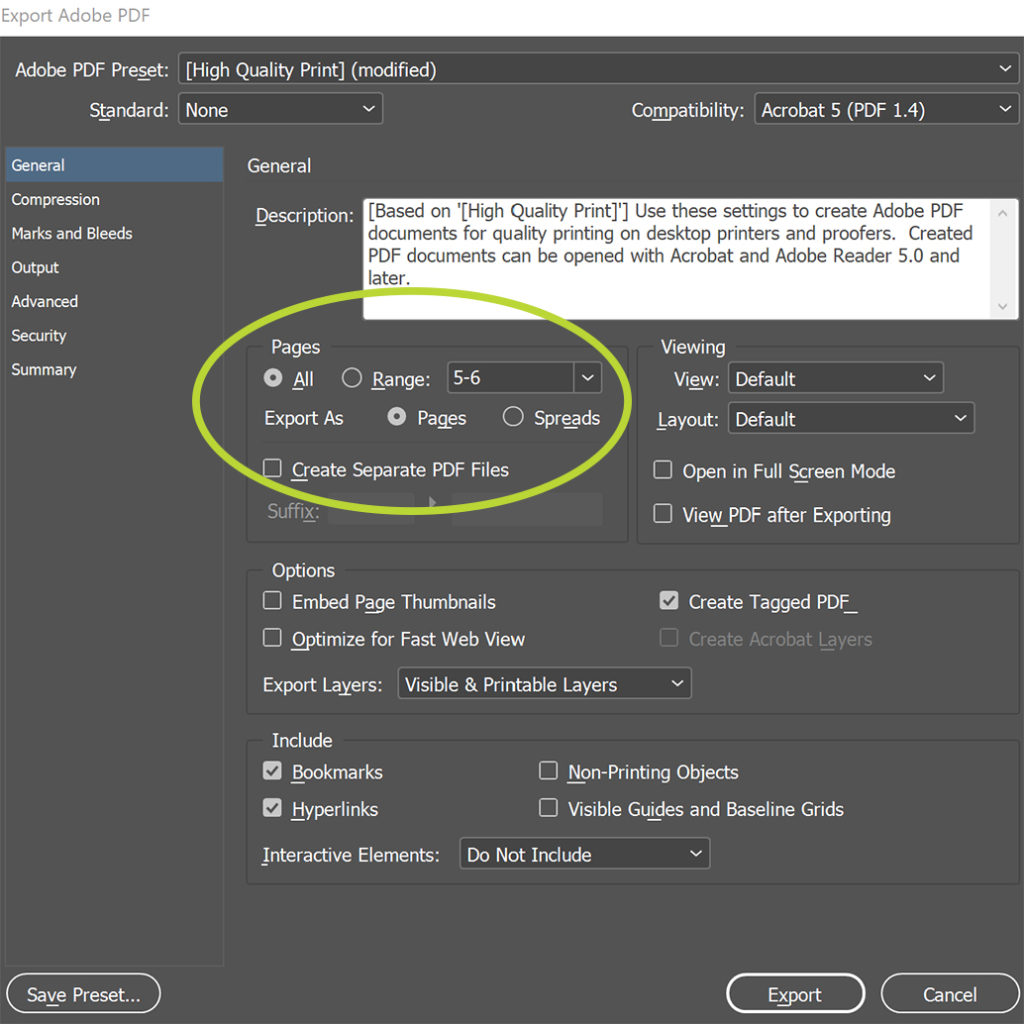
First, make sure you’re exporting all the pages in your book. You can do this in the General options panel under the Pages heading. Select the All radio button (not the Range radio button).
Export as Pages
Next, just below the Pages/Range option, make sure your Export As selection is Pages (not Spreads). I have encountered very few printers who want the PDF as spreads, and none of them have been for print-on-demand or book-length projects. Most printers’ software and machines work much better with pages.
It’s worth noting that every spread in your book should have two pages, even if one of them is blank, except for the first page and the last page (if that last page is an even-numbered page). If your book doesn’t include blank pages, most printers will end up printing your file in ways that don’t match your vision (but do match the file you sent them).
After you’ve verified that you’re exporting your entire book as pages, you can move on to the next set of options.
Compress Images (But Not Too Much)
On the left-hand side of the Export Adobe PDF panel, you’ll see a list of sections: General, Compression, Marks and Bleeds, etc. Now that you’re done with the General options, click Compression. This section lets you compress your images, which can help keep your PDF file size smaller and make uploading and sending it easier. This is optional, but if you do choose to do it, make sure you don’t compress your images too far.
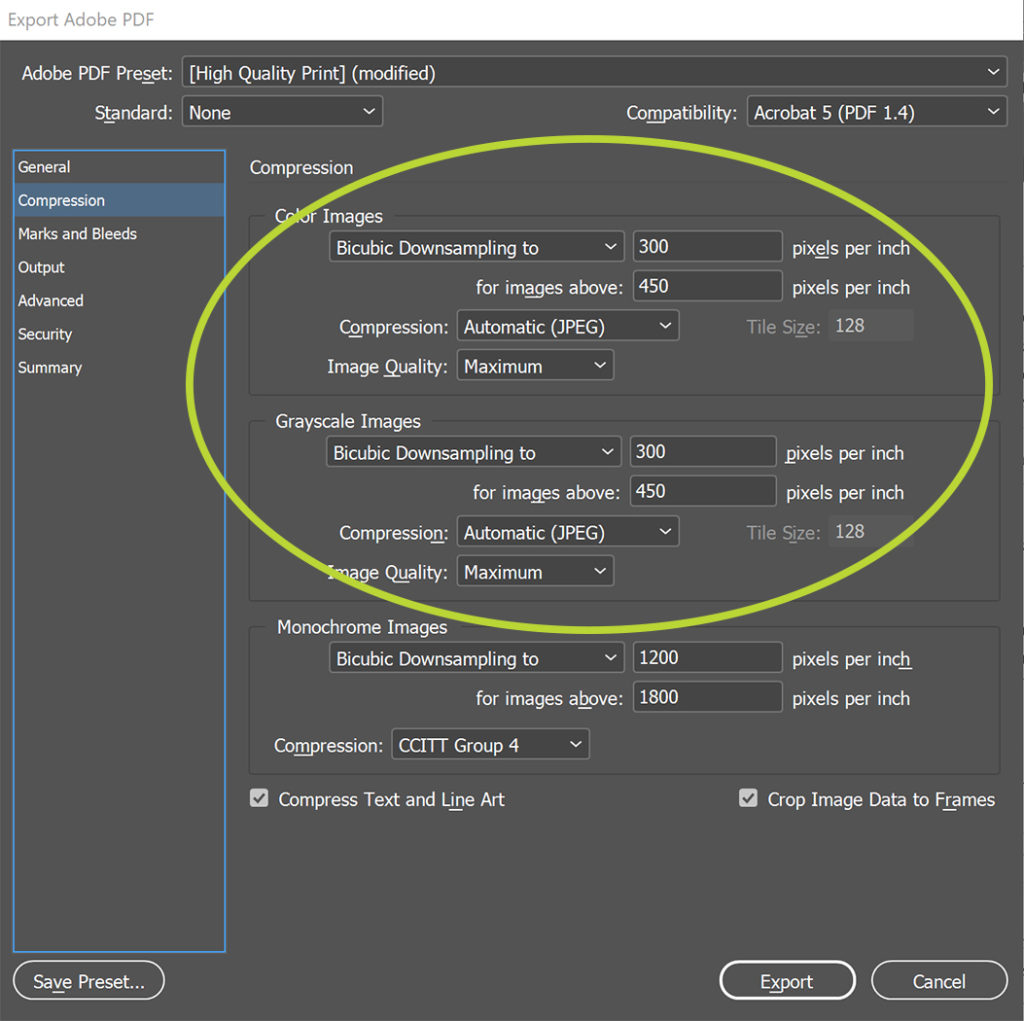
For both color and grayscale images, make sure you don’t downsample them below 300 pixels per inch (ppi). That 300 ppi size makes for really solid print quality, so you won’t be cheating your book by shrinking that far.
My usual settings are to use bicubic downsampling to 300 pixels per inch
for images above 450 pixels per inch. I set the compression to use “Automatic (JPEG)” and the image quality to “Maximum.” Check out the image to the right to see what those settings look like.
Marks & Bleed Options
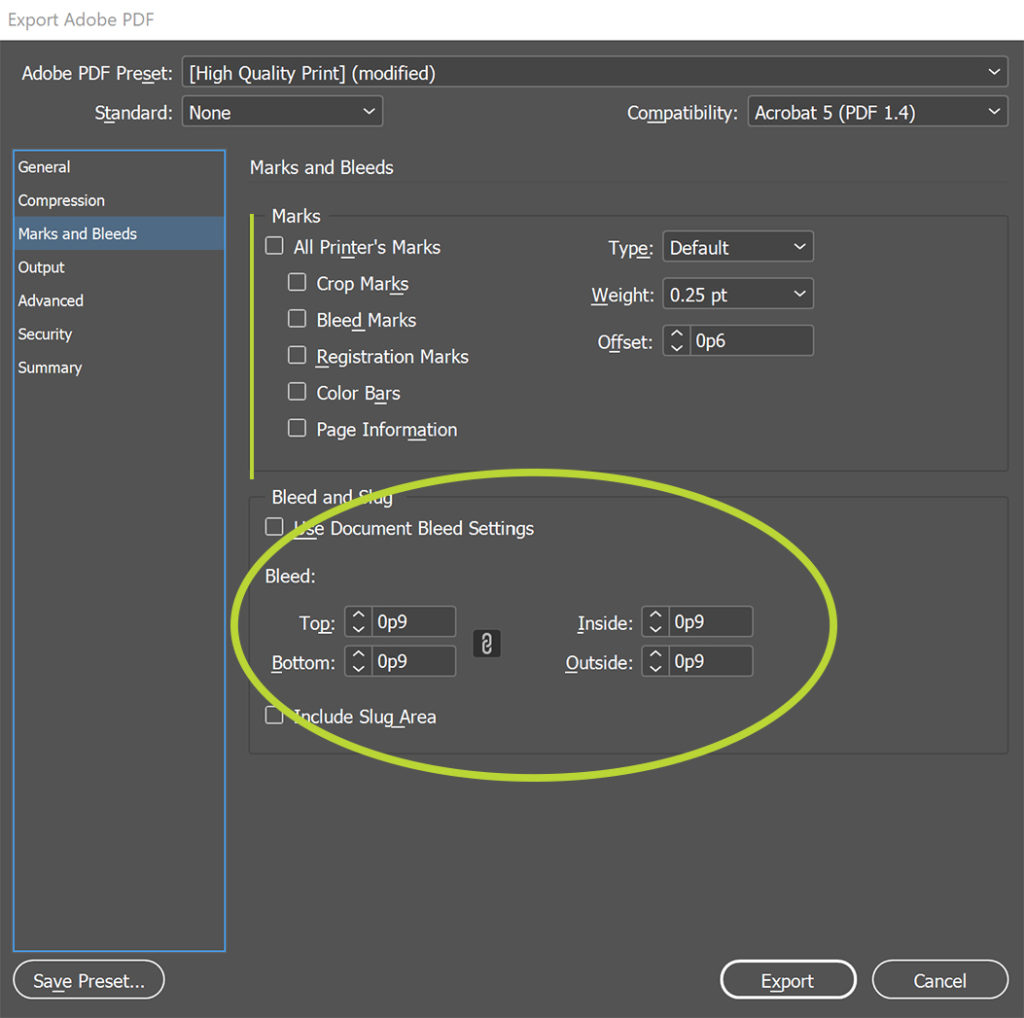
Now that you’re done with Compression options, you can move to the Marks and Bleeds options. For many book interiors, you won’t need to change any of the options here. However, if you have any page elements that go over the edge of the paper, you’ll need to include a bleed. (For example, our historical romance template, Dashwood, has bleeding elements on the part/section divider pages.) Almost all covers need a bleed because cover images almost always run to the very edge of the paper (and farther!).
For KDP and IngramSpark, do not include any marks—just make sure all the marks boxes are unchecked. There are other printers that will, at minimum, want crop marks, but crop marks don’t jive with KDP and IngramSpark’s systems.
If you need to include a bleed (again, your cover will almost certainly need this, and sometimes the interior does too), go to the Bleed and Slug section of the Marks and Bleeds options. Make sure the bleed options have 9 points (0p9) or an eighth of an inch (0.125″) in all the boxes.
Export for POD
The other default settings should work for the main print on demand providers and for most other print providers as well. Go ahead and click the Export button at the bottom of the Export Adobe PDF panel. Your file will save in the location you picked at the beginning of the process, and from there you can send it to whichever print provider you’re using for your book.
Do you have more questions about InDesign’s PDF settings? Ask about it in the comments!



[…] PDF Export Options in InDesign for Print on Demand. Adobe InDesign is the publishing industry’s standard for formatting books, but its versatility means the PDF export options can be intimidating if you’re new to print production. The good news is that you don’t need to know everything about InDesign’s export options to get an excellent, reader-ready result. […]